Master Free Motion Embroidery on Your Sewing Machine: Step-by-Step Guide
Learn to master free motion embroidery on a sewing machine with setup, stabilization, stitch control, and troubleshooting tips for beginners and hobbyists.

With this guide, you will learn how to perform free motion embroidery on a sewing machine. Start by selecting a darning foot, stabilizing the fabric, and adjusting tension and speed. Practice simple shapes, then progress to dense motifs. You’ll gain control over stitches, speed, and accuracy for creative embroidery projects.
What is free motion embroidery on a sewing machine and why use it
Free motion embroidery on a sewing machine is a technique that lets you move the fabric rather than the machine's feed dogs to create stitches. The result is a hand-drawn look, with lines that vary in density and direction. According to Sewing Machine Help, this method expands your creative toolkit beyond standard stitches and decorative patterns. You can use it for quilts, personalizing garments, embellishing home decor, or simply practicing control and coordination. Unlike traditional machine embroidery, you guide the needle with your movements rather than the fabric feeding automatically. This requires a different setup, including a compatible free-motion foot and proper stabilization of both fabric and stabilizer. The payoff is expressive texture, free-form motifs, and a sense of hands-on control that is both therapeutic and satisfying for hobbyists and beginners.
Essential equipment and materials
Before you start, gather the basic tools and supplies. The goal is to create a comfortable, stable workspace and have everything within reach. You’ll need a sewing machine that accepts a free-motion (darning) foot, a sturdy table, good lighting, and a few stabilizers to keep fabric from shifting. Use a neutral or contrasting thread to clearly see your stitches. Keep a scrap fabric sandwich handy for practice. The right setup reduces frustration and helps you focus on line quality, density, and motion control. Sewing Machine Help emphasizes building confidence with a few simple exercises before tackling larger projects.
Setting up the machine for free motion embroidery
Begin by attaching the free-motion (darning) foot to your machine. Lower the feed dogs so you can move the fabric freely under the needle, and set the stitch length to the minimum or zero as your machine allows. Thread the machine with a compatible upper thread and a matching bobbin, then test on scrap fabric to confirm smooth movement and balanced tension. If the stitch looks bulky, adjust tension and needle choice; if it skips stitches, re-seat the needle and re-thread. Slow speed at the start is key to preventing abrupt movements and thread breaks. This setup is essential for clean lines and consistent stitches during your practice.
Stabilizing fabric and workspace setup
Stabilization is critical for free motion embroidery. Use tear-away or cut-away stabilizers depending on fabric weight, and consider a water-soluble stabilizer for delicate fabrics. Tape the stabilizer to the underside of the fabric to prevent shifting. Create a comfortable workspace with a flat, non-slip mat, a transparent ruler for guidance, and a small sewing glove or grip to control fabric movement. A well-lit, clutter-free area reduces mistakes and helps you track your motion precisely as you move the fabric under the needle.
Choosing threads and needles
Choose threads that glide smoothly through the fabric and under the foot. Polyester embroidery thread is a solid all-purpose option, while rayon adds a slight sheen for decorative effects. For most fabrics, a sharp or microtex needle provides cleaner penetration and reduces fuzzing around the stitch line. Start with neutral colors to clearly see line work, then experiment with contrasting threads to create texture. Remember to test thread combinations on a scrap piece before committing to a project.
Basic free motion stitches and practice exercises
Begin with simple forms to build muscle memory: straight lines, gentle curves, and figure-eights. Move slowly and maintain a relaxed grip while guiding the fabric. Practice looped stitches and dense meanders to mimic quilting textures. Record which motions create smoother curves and which produce jagged edges, then adjust your hand position and speed accordingly. Regular practice will improve control, stitch density, and consistency across motifs.
Designing motifs: from doodles to patterns
Start with rough doodles on paper to plan your motifs, then translate them to fabric by tracing lightly with a fabric marker. Build motifs from simple shapes into more complex patterns, varying density to create shading and texture. Consider starting with a single motif per small project piece to reduce complexity before combining several designs. As you gain confidence, you can map larger designs and refine transitions between shapes for a cohesive look.
Troubleshooting and common mistakes
Thread nests on the underside often indicate tension issues—adjust upper tension or rethread. Skipped stitches can result from a loose needle or insufficient needle insertion; reseat the needle and ensure it’s properly installed. Fabric puckering is usually caused by an overly tight stabilizer or lack of fabric stabilization; increase stabilization or loosen the grip slightly. Jump stitches occur when moving too slowly or lifting the presser foot during stitching; keep hands guiding smoothly and maintain consistent pressure. Keeping a small stash of scrap fabrics helps diagnose problems without risking a finished piece.
Finishing tips and care for embroideries
Trim threads as you go or at the end to avoid snags in finished items. If you used water-soluble stabilizer, rinse or dab to remove residue according to the stabilizer’s instructions, then press the fabric gently with a protective cloth. Store embroidered pieces flat to prevent distortion. For quilts, launder with care using a gentle cycle and mild detergent to preserve stitch integrity. Proper finishing ensures your free motion embroidery remains vibrant and long-lasting.
Tools & Materials
- Sewing machine with free-motion (darning) foot(Ensure the foot movess freely and clears the needle area.)
- Stabilizer (tear-away or cut-away)(Choose based on fabric weight; use wash-away if fabric will be washed.)
- Water-soluble or wash-away stabilizer (optional)(Helpful for delicate fabrics or complex designs.)
- Bubble or painter's tape, removable(Keeps stabilizer aligned under fabric.)
- Thread (polyester embroidery thread or rayon)(Choose neutral or contrasting colors for visibility.)
- Bobbin thread (matched to top)(Test for balanced tension.)
- Needle (sharp/microtex)(Select needle type compatible with fabric.)
- Scrap fabric for practice(Use the same weight as your project if possible.)
- Fabric markers or tracing pencil(For motif planning on fabric.)
- Free-motion gloves or grip(Helps keep fabric moving smoothly.)
- Scissors and thread snips(Keep cuts clean to avoid snags.)
- Lint brush or small brush(Remove lint from under the foot.)
Steps
Estimated time: Estimated total time: 60-90 minutes
- 1
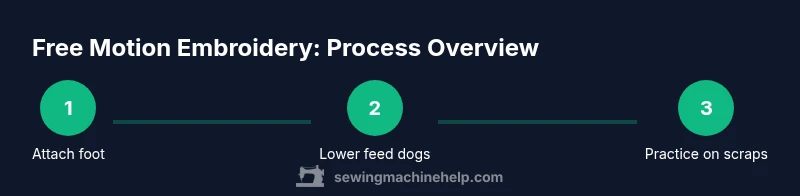
Attach the free-motion foot
Secure the free-motion foot to the machine and test that it moves freely. This foot lets you guide fabric under the needle while the needle remains vertical. Ensure there is adequate clearance for your needle to move without hitting the foot.
Tip: Test with scrap fabric to verify foot clearance before proceeding. - 2
Lower feed dogs and set stitch length to minimum
Lower the feed dogs so the fabric can glide under the needle. Set stitch length to the minimum or zero as your machine allows. This setup prevents auto feeding from altering your deliberate stitch path.
Tip: Anchor fabric with your non-dominant hand to maintain control. - 3
Thread and test on scrap
Thread the machine for embroidery and do a quick test on scrap fabric with simple lines. Check tension by looking for balanced stitches on top and bottom. Adjust upper tension or needle if threads form nests.
Tip: Use scrap fabric with similar weight to your project. - 4
Practice basic shapes
Sew straight lines, gentle curves, and figure-eights on scrap. Focus on smooth motion, not speed. Your goal is consistent line quality and control over fabric movement.
Tip: Keep hands relaxed and guide the fabric slowly to avoid wobbles. - 5
Move to a real fabric piece with stabilizer
Place stabilizer under the fabric and reposition surface as needed. Begin with light density motifs; increase complexity gradually as you gain confidence. Maintain consistent speed and direction to avoid stitches that wander.
Tip: Use a stabilizer that matches fabric weight for best results. - 6
Experiment with density and spacing
Vary density to create shading and texture. Spacing between lines affects overall look. Record what works on each fabric to build a personal guide.
Tip: Mark a few sample patterns on scrap to reproduce later. - 7
Finalize motifs and plan transitions
Plan where one motif ends and another begins. Clear transitions prevent abrupt jumps in your design. Clip thread tails as you switch motifs to avoid tangles.
Tip: Stop occasionally to trim threads and recheck tension. - 8
Finish and secure threads
Secure thread tails by stitching a few small stitches in place or tying off. Trim tails neatly. Remove stabilizers per their instructions.
Tip: Use a small snip to avoid accidentally cutting the fabric. - 9
Press and care for the finished embroidery
Press from the wrong side with a protective cloth to avoid crushing stitches. If using tear-away stabilizer, remove according to product guidance. Store flat to prevent distortion.
Tip: Avoid direct heat; use low to medium heat when pressing. - 10
Evaluate and iterate
Review your stitch control and pattern alignment. Note what you’d adjust next time for cleaner lines or denser textures. Revisit your scraps to refine techniques.
Tip: Keep a simple log of settings and outcomes for future projects.
Your Questions Answered
What is free motion embroidery on a sewing machine?
Free motion embroidery on a sewing machine is a technique where you guide the fabric under a regular needle using a free-motion foot, creating hand-drawn-looking stitches. It requires good stabilization and practice to control movement and stitch density.
Free motion embroidery on a sewing machine means you move the fabric under the needle to draw stitches, using a special foot and stabilization. It takes practice to control speed and density.
Do I need a special foot for FMQ?
Yes, a free-motion or darning foot is essential. It allows the needle to move independently from the fabric, giving you freedom to guide the stitch path.
Yes, you need a free-motion foot so you can move the fabric freely while the needle stitches.
What fabrics work best for FMQ?
Cotton blends and quilter’s cottons are forgiving for beginners. Avoid extremely slippery or very stretchy fabrics until you gain more control, and use appropriate stabilizers.
Cotton or quilting fabrics are good for starting FMQ. Steer clear of very slippery fabrics until you’re comfortable.
How can I prevent thread nests and puckering?
Ensure proper tension settings, correct needle type, and accurate threading. Stabilize the fabric and use scrap to test before stitching your project.
Check the tension, re-thread, and stabilize the fabric. Practice on scraps first to avoid nests.
Can FMQ be used on quilts?
Absolutely. Free motion embroidery techniques are widely used for quilting, to create meanders and custom motifs across quilt blocks.
Yes, FMQ is great for quilting; you can create custom meanders and motifs.
How should I finish and care for FMQ projects?
Trim threads, remove stabilizers per the product instructions, and press carefully with a protective cloth. Laundering should follow fabric care guidelines for longevity.
Trim threads, remove stabilizers, and press gently with protection.
Watch Video
The Essentials
- Practice regularly to build stitch control.
- Stabilize fabric to reduce puckering.
- Test tension and needle choice on scraps.
- Expand motifs gradually with density variation.
- The Sewing Machine Help team recommends steady practice and deliberate setup.