How to Sew Right with Your Sewing Machine: A Practical Guide
Learn to sew right with your sewing machine. This practical guide covers threading, needle and fabric choices, tension, foot selection, and maintenance for beginners and hobbyists seeking reliable stitches.

Sewing right on your machine starts with the correct setup, precise threading, and matching stitch choices to fabric. This guide provides a step-by-step calibration, needle and presser-foot selection, tension tuning, and routine maintenance to improve stitch quality and consistency, even for beginners.
What it means to sew right
According to Sewing Machine Help, sewing right means achieving even stitches, balanced tension, clean fabric edges, and reliable seam strength across diverse fabrics. When your machine is properly set up, threaded correctly, and fed at a steady pace, you reduce skipped stitches, thread jams, and fabric puckering. This section frames the goals you’ll validate as you work through the guide, from straight seams on knits to tidy topstitching on woven fabrics. Remember that every fabric behaves differently, so expect to adjust tension and needle type accordingly while keeping your technique consistent.
Set up your machine for reliability
A solid setup reduces variability. Start with a clean throat plate area and a stable work surface. Install the needle with the flat side facing the appropriate direction for your machine, thread the machine following your manual’s recommended path, and wind a fresh bobbin. Use quality threads and the correct needle size for your fabric. Finally, adjust the stitch length and tension to a baseline that produces even stitches on scrap fabric before moving to a real project.
Threading basics: top thread and bobbin path
Threading correctly minimizes bird’s-nest stitches and uneven tension. Begin by threading the presser-foot thread guide, then the take-up lever, and finally the needle. For the bobbin, ensure it tension-twists in the correct direction and sits snugly in the bobbin case. Pull the top thread through to create a slight tug when the needle threads. Always test with a scrap fabric to confirm that the needle thread and bobbin thread are interlocking properly in the middle of the fabric.
Needle and thread: matching fabric to tool
The needle choice dramatically influences stitch quality. Use a universal needle for most woven fabrics and a ballpoint needle for knits to avoid skipped stitches. Thread weight should correspond to the fabric: lighter weights for delicate fabrics and stronger polyester for sturdy materials. Keep a small assortment of needle sizes on hand and change the needle between fiber types or after every long project to maintain stitch integrity.
Tension and stitch quality: how to get it right
Tension is about balance between top and bobbin threads. If the top thread shows on the fabric surface, increase bobbin tension or reduce top tension; if the bobbin thread appears on the wrong side, do the opposite. Test on a scrap piece, adjusting in small increments (1–2 numbers at a time). Use basic stitches first to establish a baseline, then evaluate for puckering, loose stitches, or heavy seam impressions across different fabrics.
Feet, feed, and fabric handling: choosing the right tools
Presser feet influence stitch type and fabric feed. A walking foot helps for slippery fabrics; a zipper foot assists with zippers; a narrow edge-stitch foot improves topstitching accuracy. Practice guiding the fabric without pulling, and let the feed dogs move the fabric at a steady pace. Maintain a relaxed grip and a consistent seam allowance to avoid wavy edges.
Maintenance and care to keep sew right
Regular cleaning prevents lint buildup and keeps tensions stable. Remove lint from the bobbin area and under the needle plate after each longer project. Oil the recommended points as per your manual, and replace the needle after every few hours of sewing or when you notice skipped stitches. A clean, oiled machine runs more smoothly and reduces the chance of thread breaks or jams.
Troubleshooting common issues
If stitches are uneven, re-check needle size, threading path, and fabric compatibility. If the machine doesn’t move smoothly, examine the feed dogs and presser-foot pressure. For thread breaks, inspect the spool, thread path, and needle eye for burrs. Finally, run a test stitch on scrap fabric to verify the issue is resolved before continuing with your project.
Practice project and calibration routine
End with a quick calibration project: two straight seams in fabrics of different weights (e.g., cotton and poplin) plus a simple zigzag for stretch fabrics. Record the tension and stitch length that produced the best results on each fabric, and note any changes you made. This routine builds muscle memory and builds confidence in your ability to sew right with a wide range of materials.
Tools & Materials
- Sewing machine manual(Keep for tension and threading specifics.)
- Cotton fabric scraps(At least three different weights.)
- All-purpose polyester thread(Choose color to match fabric.)
- Needle assortment (universal, ballpoint)(Sizes 70/10 to 90/14 cover most fabrics.)
- Bobbin winder and empty bobbins(Fill fresh bobbins for testing.)
- Sharp scissors and snips(For clean thread cuts.)
- Lint brush or small brush(For tidying bobbin area.)
- Sewing machine oil(Only use manufacturer-recommended oil.)
- Tweezers or snips for threads(Helpful for threading near the needle.)
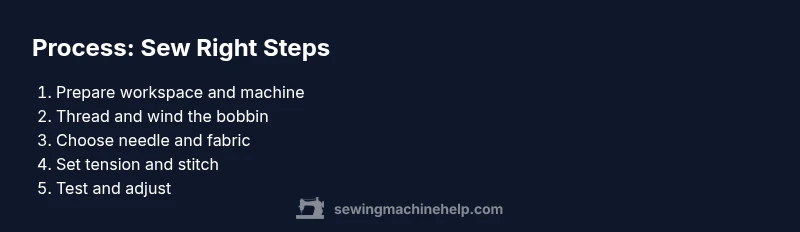
Steps
Estimated time: 45-75 minutes
- 1
Prepare workspace and machine
Clear a stable surface, plug in the machine, and remove any loose threads. Wipe the needle plate area to prevent dirt from causing jams. This creates a predictable baseline for testing and adjustments.
Tip: Take a quick photo of your current setup for reference. - 2
Thread and bobbin correctly
Follow your manual’s path for the top thread and properly wind and place the bobbin. Ensure the bobbin tension is set so the bobbin thread pulls smoothly without snagging.
Tip: Test with scrap fabric until you see even interlocking stitches. - 3
Install the right needle and fabric pair
Choose a needle suitable for the fabric type and weight. Install with the flat side in the correct orientation. Use a matching thread weight for the fabric.
Tip: Replace needle if you notice frequent skipped stitches. - 4
Set baseline tension and stitch length
Start with a standard tension setting from your manual and a mid-range stitch length. Stitch on a scrap to observe balance and adjust in small steps.
Tip: Make only one adjustment at a time to isolate effects. - 5
Seal the fabric and steady the feed
Align the fabric edges and use a straight stitch to check seam consistency. Guide the fabric with steady hands without pulling.
Tip: Maintain a consistent speed for smooth seams. - 6
Change presser-foot if needed
Switch to a foot appropriate for the task (edge stitch, walking foot, zipper foot). Re-test the stitch quality after changing feet.
Tip: Avoid forcing fabric under the foot; let the feed dogs pull it. - 7
Clean and oil after testing
Remove lint from the bobbin area, oil per manual, and re-test. A clean machine reduces friction and improves stitch quality.
Tip: Do not over-oil; a small drop goes a long way. - 8
Run a calibration project
Sew two seams of different fabrics and a zigzag stitch. Note tension and stitch settings that worked best for each fabric.
Tip: Document results for future reference.
Your Questions Answered
What does it mean to sew right with a sewing machine?
Sewing right means achieving consistent stitches, balanced tension, and clean seams across fabrics. It blends correct setup, threading, needle choice, and fabric handling to prevent issues and produce professional results.
Sewing right means consistent stitches and clean seams by using proper setup, threading, and fabric handling.
Why are my stitches uneven or puckered?
Uneven stitches usually indicate incorrect tension, wrong needle for the fabric, or improper threading. Start by testing on scrap fabric and adjust one variable at a time, such as tension or needle type, until stitches lie flat and balanced.
Uneven stitches come from tension or needle mismatches. Test on scrap fabric and adjust one thing at a time.
How often should I oil and clean my machine?
Clean the bobbin area and feed dog area after longer sewing sessions or every few hours of continuous use. Oil only as recommended by the manual, and avoid over-oiling, which can attract dust and cause jams.
Clean the bobbin area after heavy use, oil sparingly per the manual.
Can I sew right on any fabric?
Most fabrics work with the right needle and tension. Start with forgiving fabrics like cotton to calibrate, then adjust for delicate or stretchy materials using appropriate needles and feet.
Yes, with the right needle and tension for the fabric.
Is a walking foot always necessary?
A walking foot helps with slippery or layered fabrics by feeding them evenly. It isn’t always necessary but can improve control on difficult materials and reduce shifting.
A walking foot helps with slippery fabrics, but it’s not always essential.
Watch Video
The Essentials
- Test thread paths on scraps before stitching fabric.
- Match needle type to fabric for best results.
- Balance top and bobbin tension with small incremental changes.
- Use the right presser-foot for the task to improve accuracy.
- Regular cleaning and oiling prevent common jams.