How to Hem Pants with a Sewing Machine Without Cutting
Master a no-cut hemming technique for pants using your sewing machine. This guide covers fabric options, precise measurements, stitch choices, and pro tips for durable, neat hems without trimming the fabric.

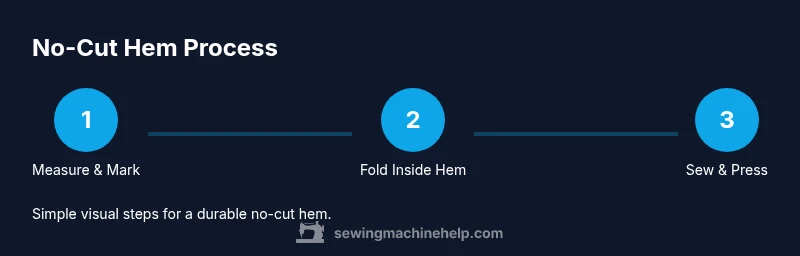
By following this no-cut hemming method, you shorten pants with a sewing machine without removing any fabric. You create a neat inside fold, stitch along the crease, and press flat for a durable finish. This approach preserves the original hem and works on many fabrics with common stitches and careful handling. It’s ideal for casual pants and office wear alike.
Why this no-cut hemming method fits home sewers
According to Sewing Machine Help, this no-cut hemming approach is an excellent option for home sewists who want to adjust length without sacrificing fabric or the original hem. The method leverages an inside fold that disappears from the outside while still shortening the garment. It minimizes waste and reduces the risk of uneven hems because you’re working with the existing hemline as a guide. You’ll get a professional look with just your regular sewing machine, a few common notions, and some careful pressing. This technique is especially friendly for beginners who want a sturdy result without mastering a new, specialized tool set. As you practice, you’ll gain confidence and speed, and you can adapt the concept to a variety of fabrics and styles.
Understanding fabric behavior and when to choose this method
Not all fabrics behave the same when you hem without cutting. Lightweight cottons drape easily and allow a precise fold, while knits can stretch if you pull too tightly. Heavier fabrics like denim or wool blends require careful stabilization to prevent a wavy edge. The fundamental principle remains: keep the original hem intact and create a controlled, inside-fold hemline that you stitch securely. This approach is particularly useful for pants with a clean, finished bottom edge or where a traditional cut-and-hem would compromise a design detail. Before you start, consider fabric weight, stretch, and the garment’s intended use. Sewing Machine Help’s guidance emphasizes adapting your technique to the fabric’s characteristics and the desired final appearance.
Inside-fold hemming: the core idea and how it preserves the original hem
The inside-fold hemming method relies on folding the fabric toward the inside of the leg to form a double layer that effectively shortens the garment without removing fullness. The original hem acts as a built-in guide, helping you maintain even length on both legs. The visible edge stays untouched, which matters when you’re hemming delicate fabrics or trousers with decorative hems. You’ll still need to secure the fold with stitches that conceal the thread path on the outside, or choose a stitch pattern that minimizes visibility. The goal is a clean, durable finish that stays aligned through wear and washing.
Tools and workspace setup for an accurate no-cut hem
A comfortable, well-lit workspace is essential. Gather a sewing machine with straight and zigzag stitch capabilities, a spool of matching thread, a sharp needle suitable for the fabric weight, and at least one pin or clip to hold the fold in place. Have a measuring tape, marking tools (chalk or fabric marker that washes out), and a good iron with a stable ironing surface. Keep scissors reserved for fabric only, and consider a seam ripper for quick fixes. A straight ruler or hem gauge helps you maintain consistent depth on both legs. Set up a cutting mat or clean table to protect surfaces, and keep a mirror handy to check length while standing.
Measuring and marking consistently for no-cut hems
Precise measurement is the backbone of a successful no-cut hem. Determine the final length by wearing the pants or using a mobile fitting method, then mark both pant legs at the same height from the floor. If you’re adjusting multiple pairs, make a small chalk line or dot at the target length on the inside leg seam. Use a disappearing fabric marker so the marks are easy to remove later. A helpful tip is to measure from the inseam and the outer seam to ensure both sides match. Double-check with a tape measure: the distance from the floor to the mark should be identical on both legs before you fold. This ensures symmetry and avoids a lopsided hem.
Stabilizing fabric before folding to prevent puckers
Stabilizing fabric is crucial, especially when working with woven fabrics that may fray or stretch. A light stay-stitch along the edge inside the seam allowance can prevent shifting while you fold. Press the area gently to set the stay-stitch and then fold the hemline to the desired depth. For stretch fabrics, use a narrow zigzag or a stretch stitch to allow for movement. If you’re hemming denim or heavier fabrics, consider a small amount of interfacing or a stabilizer on the inside between the fold and garment face to maintain shape. Stabilization reduces distortion and makes the final topstitch neater.
Stitch choices for a no-cut hem: options and trade-offs
Your stitch choice should reflect fabric type and the desired look. A standard straight stitch works well on woven fabrics when combined with a tidy fold and press. For knit fabrics, a stretch stitch or a small zigzag helps the hem flex with wear. If you want minimal topstitch visibility, use a “stitch in the ditch” style where the stitch line sits within the fold. A double-stitched finish can increase durability on heavier fabrics. Always test stitches on scrap fabric that matches your pants’ weight and fiber composition to avoid surprises on the final garment.
Step-by-step workflow: no-cut hemming with a regular sewing machine
This section explains the practical flow of actions you’ll perform. Start by marking the final length and pressing the fabric to prepare a crisp fold. Create an inside fold that hides the raw edge and align the fold with the marks. Use pins or clips to hold the fold parallel to the leg. Set your machine to a secure stitch length, and sew close to the inner crease, catching only the folded edge. Finish with a gentle press to set the seam. If you see edge scalloping or waviness, adjust tension, recheck the fold, and re-press before checking the final length on your feet.
Handling tricky fabrics: denim, wool, and knits without cutting
Denim and wool often require a stronger approach. Use a denim needle or heavier universal needle and consider a small topstitch along the outside if desired for extra durability. For bulky seams, feed the fabric slowly and consider a walking foot. Knits demand careful tension and a stretch stitch so the hem maintains flexibility. If you’re unsure about the fabric’s behavior, practice first on an old garment or scrap to dial in stitch length, tension, and fold depth. With patience, even heavyweight fabrics respond well to the no-cut hem.
Finishing touches: pressing, washing, and maintenance
After you finish the seam, press the hem firmly along the fold to set the crease. Let the fabric cool before wearing or washing. A light spray of fabric starch can help you keep the crease crisp, but avoid over-starching delicate fabrics. When washing, use a gentle cycle and cold water to prevent shrinkage that could alter the hem length. If you must adjust later, use the same no-cut method and re-press to restore symmetry. With consistent care, your no-cut hem should remain neat for many wears and washes.
Troubleshooting and common mistakes to avoid
Common problems include puckering, uneven folds, and thread showing on the outside. If you notice puckering, recheck needle size, stitch type, and tension. Uneven folds usually mean the marks or folds weren’t parallel; re-mark and re-fold, then re-stitch. If thread shows on the outside edge, adjust needle position so the stitch catches only the folded layer. Practicing on the same fabric type and weight helps you recognize subtle cues before working on your final garment.
Care and long-term durability of no-cut hems
No-cut hems are durable when stitched with appropriate tension and stitch length for the fabric. Regularly inspect the fold to ensure it remains flat and doesn’t shift after washing. For fabrics prone to fraying, consider applying a light seam sealant or a narrow zigzag to the folded edge. If the hem begins to loosen, reinforce with a secondary line of stitching along the fold or re-stitch the crease to reestablish stability. Proper pressing after washing also helps maintain a crisp crease.
When to switch to a traditional cut-and-hem approach
Certain designs or fabric blends may benefit from a traditional cut-and-hem method for the most predictable edge finish. If the garment is a thick or heavy fabric, or if the hem edge needs a decorative finish that requires visible stitching, consider a conventional hemming approach. You can still preserve your no-cut technique as a reference for future projects, but be prepared to adapt to the fabric and garment design. The key is to choose the method that yields the best fit and durability for the specific item.
Tools & Materials
- Sewing machine with straight and zigzag stitches(Any standard home machine with adjustable stitch options)
- Matching sewing thread(Weight appropriate for fabric, keep a spare spool)
- Needle suitable for fabric weight(Universal 90/14 for woven; denim needle for thick fabrics)
- Fabric marker or chalk(Water-soluble for easy removal)
- Measuring tape(30-60 inches for easy measurement around legs)
- Pins or sewing clips(Hold the fold securely without shifting)
- Iron and ironing board(Pressing is essential to set folds and creases)
- Sharp fabric scissors(Only for fabric, not paper or thread)
- Seam ripper(For quick fixes if a seam goes off)
- Walking foot (optional for heavy fabrics)(Helps feed thick fabrics evenly)
Steps
Estimated time: 1 hour 15 minutes
- 1
Mark final length
Put on the pants or use a mirror to determine the desired length. Mark both legs at the same height using your fabric marker. Double-check the marks from multiple angles and ensure they’re parallel to the floor.
Tip: Mark lightly; you should be able to erase or wash away marks after hemming. - 2
Pre-press the hem area
Press the marked area to set a crisp starting point for the fold. A clean press ensures accuracy as you create the inside fold. If needed, clip the fabric so it doesn’t shift during pressing.
Tip: Heat setting helps prevent shift; use a pressing cloth for delicate fabrics. - 3
Create the inside fold
Fold the edge inward toward the leg to create a double-fold hem that hides the raw edge. Align the fold with your marked line and press again to set the crease. Use clips or pins to keep the fold stable.
Tip: Keep the fold width consistent on both legs for even hems. - 4
Secure the fold temporarily
Place pins or clips along the fold line to hold it in place. The goal is to prevent shifting while you sew. Check that the fold remains parallel to the leg and that the outer edge of the fabric lies flat.
Tip: Space pins every 2-3 inches for stable folding. - 5
Sew along the inner crease
Set the machine for a short, secure stitch. Sew very close to the inner crease so the seam threads catch only the folded edge. Backstitch at the start and end to secure.
Tip: Use a straight stitch or a short zigzag if fabric tends to slip. - 6
Reinforce and finish the fold
Optionally add a second pass along the fold or a subtle topstitch near the outer edge for durability. This helps the hem hold up to washing and wear. Remove pins, then gently press the finished seam.
Tip: Avoid over-stretching; keep the fabric flat as you sew. - 7
Final press and check
Press the hem from the outside to set the crease. Check both legs for even length and symmetry. Try on the pants or stand in front of a mirror to verify the result before washing.
Tip: If lengths differ, adjust the fold depth on the shorter leg and re-stitch. - 8
Careful testing after washing
Wash the garment on a gentle cycle and air dry to assess the hem’s durability. If there’s any shift, you can re-press and re-stitch as needed.
Tip: Avoid high heat that can shrink or distort fabric around the hem.
Your Questions Answered
Can I hem without cutting on stretchy fabrics?
Yes, but use a stretch stitch or a tiny zigzag to accommodate movement. Stabilize with a light stay-stitch and avoid stretching the fabric while sewing.
Yes, stretchy fabrics can be hemmed this way with a stretch stitch and careful stabilization to avoid distortion.
Will this method work on lightweight fabrics?
Absolutely. Lightweight fabrics are forgiving for inside folds, but you should use smaller stitches and avoid heavy pressure to prevent puckering.
Lightweight fabrics do well with this method; just use a fine stitch and moderate pressure.
Do I need a blind hem foot for this technique?
A blind hem foot can help, but you can accomplish the look with a standard foot by placing stitches to catch only the fold edge.
A blind hem foot helps, but you can do it with a regular foot by aiming for the fold edge.
Preserve jeans hem?
Jeans can be tricky due to thickness. Use a denim needle, a shorter stitch length, and consider extra reinforcement on the fold.
Jeans require a sturdier needle and maybe reinforcement, but you can still hem without cutting.
Re-hem later?
Yes. You can re-hem later by repeating the same no-cut method on the adjusted length, then re-press.
You can re-hem later by repeating the no-cut method and re-pressing.
Waistband seam issues?
If a waistband interferes with the fold, adjust the fold depth or temporarily work from the inner side to keep the outside edge clean.
If the waistband interferes, adjust the fold depth and keep the outside edge neat.
Watch Video
The Essentials
- Measure accurately before folding
- Preserve the original hem by folding inward
- Choose stitches suited for fabric type
- Press thoroughly for crisp results
- Test on scrap fabric first